
“memos” is a privacy-focused, lightweight, self-hosted note-taking service that makes it easy to capture and share your brilliant ideas. WordPress, as a web content management system, lacks a mechanism for sharing fragmented content similar to microblogs like Twitter. Embedding the memos timeline in WordPress can solve this problem and provide your readers with more ways to understand you.
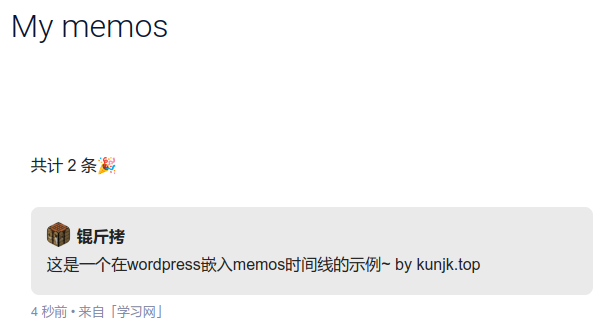
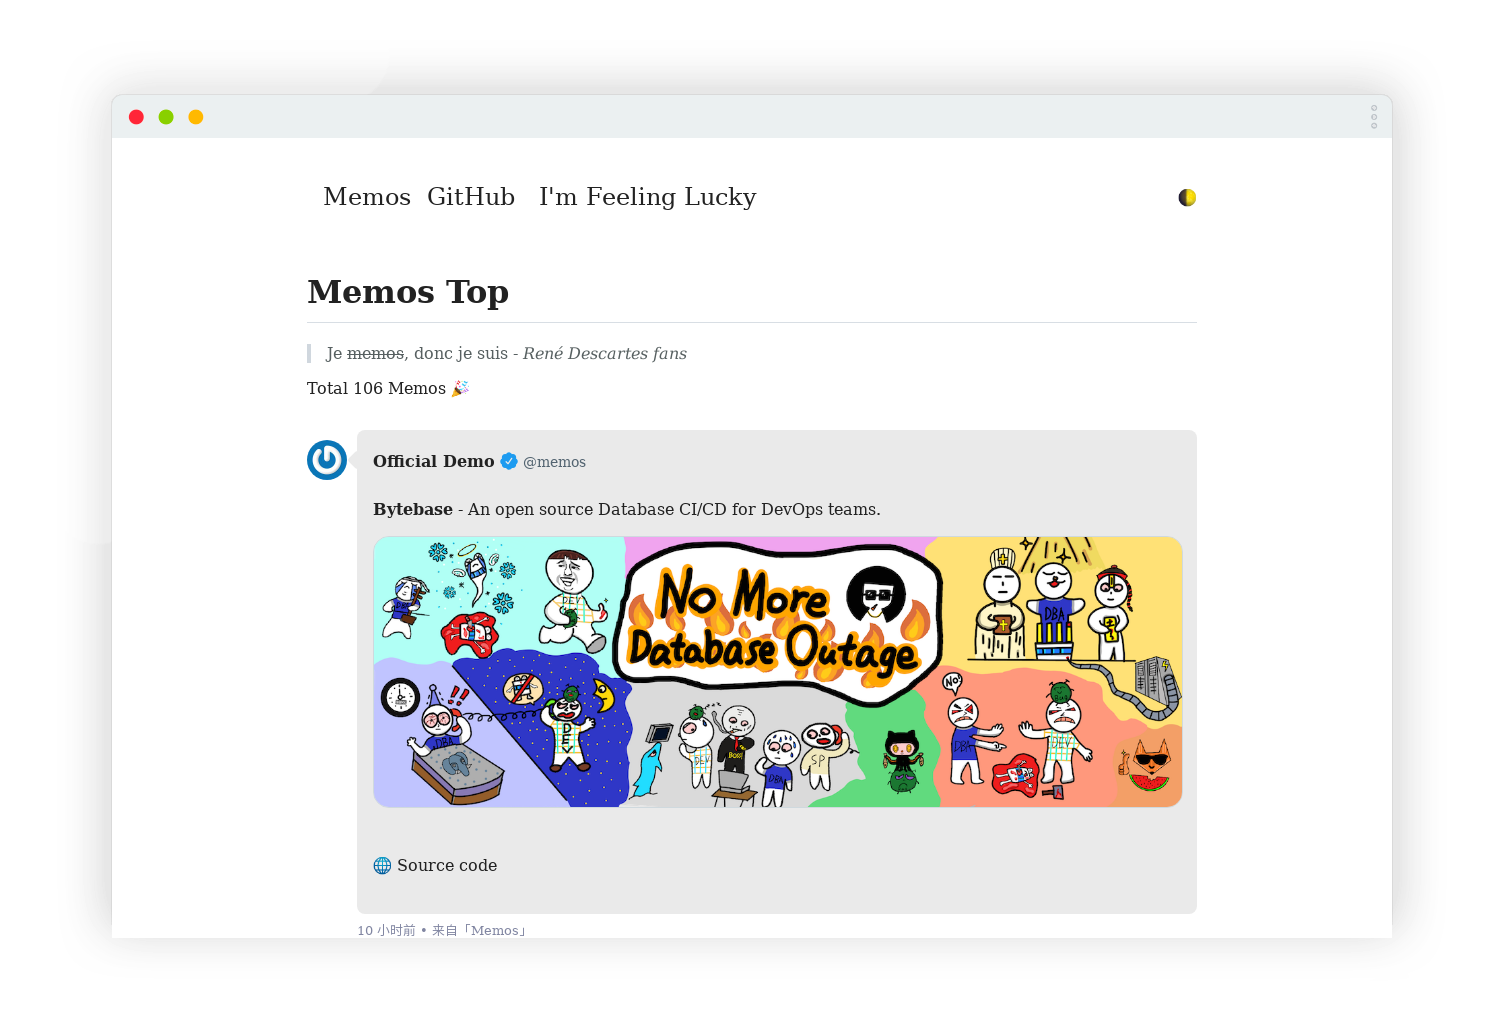
“memos.top” is a service that uses the memos API to render static pages. In this article, we will show how to embed a specific user’s public timeline by writing iframe code in a custom HTML block in WordPress, which allows you to achieve this goal. You can also use a similar method to embed a MemosGallery to display all your public images in memos. You can check out the example I have configured.
Since it’s implemented through iframes, it should work on websites other than WordPress as well.
For information on deploying memos, please refer to the official documentation.
1. Configure “memos.top”
To deploy “memos.top” in your desired location, run the following command:
git clone https://github.com/eallion/memos.topThen open index.html and make the following modifications:
<script type="text/javascript">
    var memos = {
        host: 'https://demo.usememos.com/',  // Your memos address, ending with '/'.
        limit: '10',  // Timeline display limit.
        creatorId: '1',  // User ID.
        domId: '#memos',  // Default #memos.
        username: 'memos',  // Displayed username.
        name: 'Official Demo',  // Displayed name.
    }
</script>
You can modify the content of the HTML file according to your needs. In WordPress, you only need to embed the timeline, so you can remove everything else.
At the end of the body section in index.html, add the following script to help adjust the iframe size:
<script type="text/javascript" src="https://cdnjs.cloudflare.com/ajax/libs/iframe-resizer/4.3.7/iframeResizer.contentWindow.min.js" defer=""></script>Now, you can visit this HTML page separately to check if the public timeline is displayed correctly. If it works, you can proceed.
2. Configure in WordPress
Go to the editing page of your article/page, create a custom HTML block, and insert the following content:
    <script type="text/javascript">
      /*
       * If you do not understand what the code below does, then please just use the
       * following call in your own code.
       *
       *   iFrameResize({log:true});
       *
       * Once you have it working, set the log option to false.
       */

      var callbackDisplay = 'p#callback'

      iFrameResize({
        log: false, // Enable console logging
        inPageLinks: true,
        onResized: function (messageData) {
          // Callback fn when resize is received
          $(callbackDisplay).html(
            '<b>Frame ID:</b> ' +
              messageData.iframe.id +
              ' <b>Height:</b> ' +
              messageData.height +
              ' <b>Width:</b> ' +
              messageData.width +
              ' <b>Event type:</b> ' +
              messageData.type
          )
        },
        onMouseEnter: function (messageData) {
          // Callback fn when mouse enters iframe
          $(callbackDisplay).html(
            '<b>Frame ID:</b> ' +
              messageData.iframe.id +
              ' <b>ScreenX:</b> ' +
              messageData.screenX +
              ' <b>ScreenY:</b> ' +
              messageData.screenY +
              ' <b>Event type:</b> ' +
              messageData.type
            )
        },
        onMouseLeave: function (messageData) {
          // Callback fn when mouse enters iframe
          $(callbackDisplay).html(
            '<b>Frame ID:</b> ' +
              messageData.iframe.id +
              ' <b>ScreenX:</b> ' +
              messageData.screenX +
              ' <b>ScreenY:</b> ' +
              messageData.screenY +
              ' <b>Event type:</b> ' +
              messageData.type
          )
        },
        onMessage: function (messageData) {
          // Callback fn when message is received
          $(callbackDisplay).html(
            '<b>Frame ID:</b> ' +
              messageData.iframe.id +
              ' <b>Message:</b> ' +
              messageData.message
          )
          alert(messageData.message)
          document
            .getElementsByTagName('iframe')[0]
            .iFrameResizer.sendMessage('Hello back from parent page')
        },
        onClosed: function (id) {
          // Callback fn when iFrame is closed
          $(callbackDisplay).html('<b>IFrame (</b>' + id + '<b>) removed from page.</b>')
        },

      })
    </script>
Please note that in the iframe src=”/memo_static.html” part, you should modify “/memo_static.html” to the location of the index.html file where you placed “memos.top” in the first step.
You can deploy all the JavaScript scripts in your website directory, and change the src to something like “./js/iframeResizer.contentWindow.min.js”.
Now, your memos timeline can seamlessly be embedded in WordPress pages/articles!
References:
- usememos/memos: A privacy-first, lightweight note-taking service. Easily capture and share your great thoughts – Github
- eallion/memos.top: ✍ A static page rendered with the Memos API.
- 支持跨域的iframe自适应高度方法 – 锟斤拷的博客
Recent Comments