
Pleroma is a lightweight decentralized social media network software, similar to Mastodon and Misskey, which can interact with other social media programs that support ActivityPub, and have many fork like Pleroma Rebased, Akkoma.
I had deployed two Pleroma instances on different servers. To facilitate maintenance, I needed to migrate one of the Pleroma instances to the server where another Pleroma instance was already running. However, I couldn’t find relevant information in the official documentation or on Google. This article will explain how to run multiple Pleroma instances on one server. If you want to deploy mutiple Akkoma or (and) Pleroma Rebased, you also have to modify some files by following this passage.
This article follows the installation method described in the official documentation under “Installing on Linux using OTP releases“.
1. Coexistence requirements for two Pleroma instances
The structure of Pleroma can be roughly divided into the following parts:
- Installation location:
/opt/pleroma/ - Configuration file:
/etc/pleroma/config.exs - Static files:
/var/lib/pleroma/static/ - Upload storage:
/var/lib/pleroma/uploads/ - Service configuration:
/etc/systemd/system/pleroma_2.service - User:
pleroma - PostgreSQL database:
pleroma
The installation location is also the home directory for the Pleroma user.
First, we need to separate these directories for different instances. For example, for the second instance (you can change this as needed):
- Installation location:
/opt/pleroma_2/ - Configuration file:
/etc/pleroma_2/config.exs - Static files:
/var/lib/pleroma_2/static/ - Upload storage:
/var/lib/pleroma_2/uploads/ - Service configuration:
/etc/systemd/system/pleroma_2.service - User:
pleroma_2 - PostgreSQL database:
pleroma_2
You should inform the second Pleroma instance about its new locations to avoid conflicts with the existing Pleroma instance.
2. Installing the Second Pleroma Instance
Here, we follow a similar installation and setup process as described in the official documentation under “Installing on Linux using OTP releases“.
# Create the Pleroma_2 user
sudo adduser --system --shell /bin/false --home /opt/pleroma_2 pleroma_2

# Set the environment variable for system architecture (skip if already downloaded)
# For example, if it's `amd64-musl`, the command is
export FLAVOUR="amd64-musl"

# Download Pleroma and unzip it to a temporary directory (skip if already downloaded)
sudo su pleroma -s $SHELL -lc "
curl 'https://git.pleroma.social/api/v4/projects/2/jobs/artifacts/stable/download?job=$FLAVOUR' -o /tmp/pleroma.zip
unzip /tmp/pleroma.zip -d /tmp/
"

# Move Pleroma to the home directory of Pleroma_2
sudo su pleroma -s $SHELL -lc "
mv /tmp/release/* /opt/pleroma_2
rmdir /tmp/release
rm /tmp/pleroma.zip
"

# Create the upload directory for the second instance "/var/lib/pleroma_2/uploads"
sudo mkdir -p /var/lib/pleroma_2/uploads

# Create the static file directory for the second instance "/var/lib/pleroma_2/static" and set the correct permissions
sudo mkdir -p /var/lib/pleroma_2/static
sudo chown -R pleroma /var/lib/pleroma_2

# Create the configuration file directory for the second instance (you can also place it in the same directory as the first instance, e.g., "/etc/pleroma/config_2.exs")
sudo mkdir -p /etc/pleroma_2
sudo chown -R pleroma /etc/pleroma_2

# Run the configuration file generator (skip this part for migration, as the configuration file has already been generated)
# Please note that when asked for the directory, input the directory you created for the second instance
# Ensure that the port numbers for the two instances are different (default is 4000)
# Ensure that the database names for the two instances are different, e.g., for the second instance, the user is "pleroma_2" and the database is "pleroma_2"
sudo su pleroma -s $SHELL -lc "./bin/pleroma_ctl instance gen --output /etc/pleroma/config.exs --output-psql /tmp/setup_db.psql"
For migrating, you can move the corresponding files from the original locations to the directories on the new server.
3. Modifications for Coexistence
This section is mostly for migration. Therefore, for readers installing the second instance for the first time, some parts may be repetitive and can serve as a double-check.
1) In the config.exs file (/etc/pleroma_2/config.exs), modify the static file and upload storage locations, and also change the port to avoid conflicts.
config :pleroma, Pleroma.Web.Endpoint,
   # Modify the port (default is 4000)
   http: [ip: {0, 0, 0, 0}, port: 4001],

# Modify the static file directory
config :pleroma, :instance, static_dir: "/var/lib/pleroma_2/static"
# Modify the upload file directory
config :pleroma, Pleroma.Uploaders.Local, uploads: "/var/lib/pleroma_2/uploads"
Please pay attention to the permissions for the configuration file (especially for migrating readers) and you can set the permissions with the following commands:
sudo chown pleroma_2 /etc/pleroma_2/config.exs
sudo chmod o= /etc/pleroma_2/config.exs
2) Create a new user named “pleroma_2” (explained in Part 2).
3) Modify the service configuration for the second Pleroma instance (/etc/systemd/system/pleroma_2.service). If it doesn’t exist, you can copy it from “/opt/pleroma_2/installation/pleroma.service.”
There are five places that need modification:
; Name of the user that runs the Pleroma service.
User=pleroma_2

; Make sure that all paths fit your installation.
; Path to the home directory of the user running the Pleroma service.
Environment="HOME=/opt/pleroma_2"
; Path to the folder containing the Pleroma installation.
WorkingDirectory=/opt/pleroma_2
; Path to the Pleroma binary.
ExecStart=/opt/pleroma_2/bin/pleroma start
ExecStop=/opt/pleroma_2/bin/pleroma stop
Apply the service configuration:
sudo systemctl enable pleroma_2
4) Modify Environment Variables
While examining the source code, it was found that the configuration file location and instance sname need to be modified through environment variables. The environment variable for Pleroma is located at “/opt/pleroma_2/releases/2.5.5/env.sh”(may vary depending on version path)
Comment out the original sname content (RELEASE_NODE) and add an environment variable for the configuration file location (PLEROMA_CONFIG_PATH). The file should look like this:
export RELEASE_DISTRIBUTION="${RELEASE_DISTRIBUTION:-name}"
#export RELEASE_NODE="${RELEASE_NODE:-pleroma_xx@127.0.0.1}"
export RELEASE_NODE="pleroma_2@127.0.0.1"
export PLEROMA_CONFIG_PATH="/etc/pleroma_2/config.exs"
5) Database Configuration
First, access the PostgreSQL command line:
sudo su - postgres
psql
Execute the following commands to create a new database and grant permissions (replace “pleroma_2” with your settings):
CREATE USER pleroma_2 WITH ENCRYPTED PASSWORD 'your-chosen-password';
CREATE DATABASE pleroma_2 OWNER pleroma_2;
Exit the command line with \q, and use “Ctrl + A + D” to exit the postgres user.
The database information should match the database information in the configuration file. For example, the password you set in the SQL command should match the “password” in the configuration file.
For readers who are installing the second instance for the first time, you can skip to the next step. The following steps are for importing the database:
You need to export the database from the original server to a SQL file:
pg_dump pleroma > movedb.sqlince the username is no longer “pleroma” but “pleroma_2,” you need to make some modifications to the SQL file to avoid permission issues:
- Replace all instances of “OWNER TO pleroma” with “OWNER TO pleroma_2”
- Replace all instances of “; Owner: pleroma” with “; Owner: pleroma_2”
You can do this easily using a text editor like gedit and the “Ctrl + H” replace-all function.
Then, transfer the modified SQL file to the new server using the following command (replace -f with the path to your modified SQL file):
sudo su postgres -s $SHELL -lc "psql -d pleroma_2 -f /path/to/movedb.sql"With this, you have completed the database import operation.
6) Trial Run
It’s advisable to first run the command to see if it works successfully. If it does, you can use service or systemctl to start it.
su pleroma_2 -s $SHELL -lc "./bin/pleroma_2 start"In this step, if the second instance runs successfully, you can then start the pleroma_2 service:
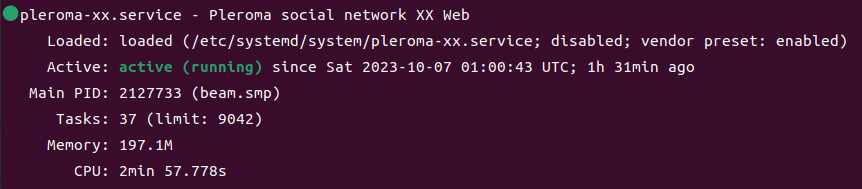
sudo service pleroma_2 startYou should be able to see the status of the second Pleroma instance running successfully in systemctl status.

Recent Comments